

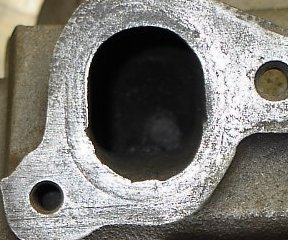

Here's what I started with. A as cast #64 casting head. As you can see, there is much room for improvement. The intake ports didn't need too much to gasket match them, but the exhaust ports on the other hand, they need a lot on a Pontiac. In the exhaust, you can barely see by the pic, there is a large 'nib' on the floor, right at the short turn. This looks very detrimental to exhaust flow!!! It is kinda a pain to remove, but spend some time and you will most certainly get it. The ports are not finished, I just did some preliminary work with a carbide burr and sanding drum.. I am waiting on a Standard Abrasive's Port and Polish kit from Summit racing.

Here is the difference in the center exhaust ports before and after gasket matching. Quite a lot of improvement eh?

These are after preliminary gasket matching with a couple of different carbide burrs and a 80 grit stone. Lookin pretty sharp compared to original.
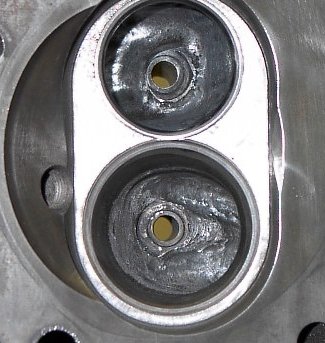
Here's a shot of the bowls. The preliminary shaping/cleaning has been done. I feel it is most prudent that if you are not sure about what you are doing, don't do any "porting" to the intake tract. You can screw up the breathing characteristics real fast. All's I have done is a cleaning of the casting flaws. Don't be too concerned with the mold lined in the runners. I found that to completely remove them, you would be removing too much material. Then that would negate all Pontiac is about, Tones of low end torque.
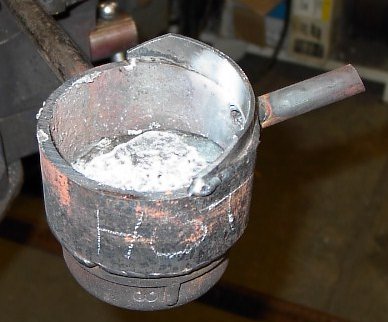
Here's what comes next, filling the exhaust crossovers with aluminum. The reason to find them it twofold. One, you don't put heat into the intake charge when we all no that a cooler, denser intake charge gives more power. That is a good thing. And two, if you use 4 tube headers like I plan on, if they are not filled in you will not have any scavenging effect from the headers on the 4 inside cylinders. When the header try's to scavenge one of these exhausts, it will try and pull from all 4 and won't scavenge worth a darn, leaving the headers performing like a set of log manifolds.
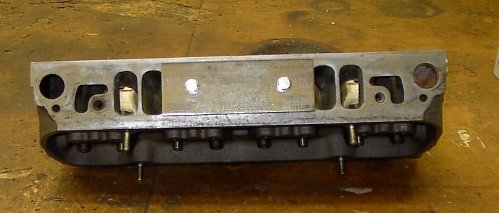
First, we have to block off the intake side of the crossover. I used a 1/4"X 2" plate steel. I drilled holes so I could use the intake bolts to hold it on. It had some rust and scale on the steel, so I took a flapper wheel on an angle grinder and ground it smooth.
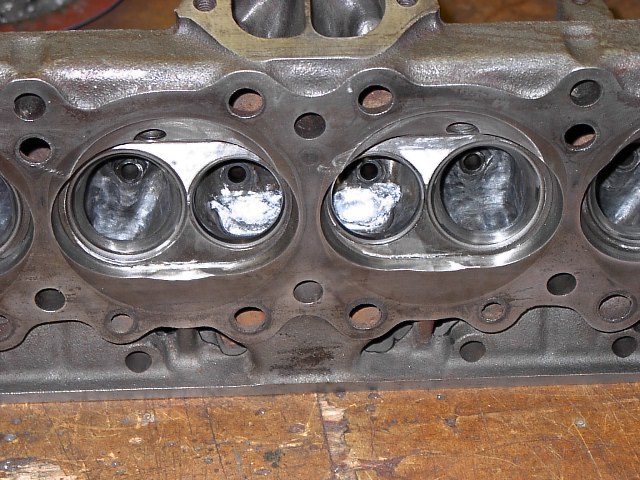
Here's what the bowls look like after pouring. I used an old piston for the aluminum because I wanted to be sure that the melting point would be high enough so it doesn't melt out of the runner. I just went to the local machine shop and asked for a scrap piston, one will be enough for both heads. I installed two valves backwards in the guides so no aluminum would stick to the guides. Don't worry, the molten aluminum won't stick to the cast head or the valve stem. I had a buddy heat the head up with a tiger torch, although I have herd of peeps having good luck putting it on there BBQ. I heated it up to 350* but I think it needs to be hotter because I had some shrinkage problems with the aluminum. It cooled fast where touching the head, but the center of the runner actually shrink back into the runner as it cooled and the aluminum shrinks. And, fill it over full, because you cannot pour over what has already cooled and solidified.
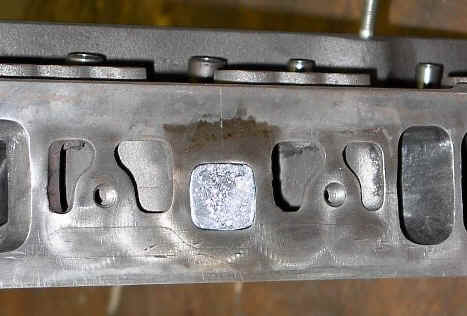
Here's what the intake side looks like after removing the block off plate. You don't have to worry about it being higher than the intake surface because of the shrink back. It is about .015" below the surface on mine.
Now all that's left is to continue blending and polishing the bowls.
A good read on Porting and Polishing
Go to: